With the Government of India striving hard to make ‘Digital India’ a reality, the support that they needed to keep all their actions firmly in place and successful, came in the form of Aadhar. The idea of a ‘One Nation One ID’ was pushed for, well before the concept of a digitalized nation. After forming a firm base with the widespread adoption of Aadhar as a standard measure of authentication all across the nation, the Government of India was able to push forward with all their might towards the realization of a ‘Digital India’
Appointment For Aadhaar Enrollment
The Aadhar has become a document of necessity, with its ever-growing list of uses and implications. From applying for PAN to filing income tax returns, from applying for a driver’s license to getting your vaccination certificate, the Aadhar has a myriad of uses, making it an irreplaceable tool to possess in modern India.
By now, almost every Indian citizen would have been enrolled on the Unique Identification Authority of India’s Aadhar registry. In case you still haven’t, it’s not too late yet. It’s still possible to apply for an Aadhar through the various Aadhar Enrollment Centers located all over the country. After filling up the Aadhar Enrollment Form that is available on the UIDAI online portal and attaching it with the necessary documents to verify the details you’ve entered, all that remains is to submit your documents along with the enrollment form at your nearest Aadhar Enrollment Center. This article strives to shed some light on the guidelines regarding online appointment for Aadhaar card at the Aadhar Enrollment centre.

Online Appointment for Aadhaar Enrollment
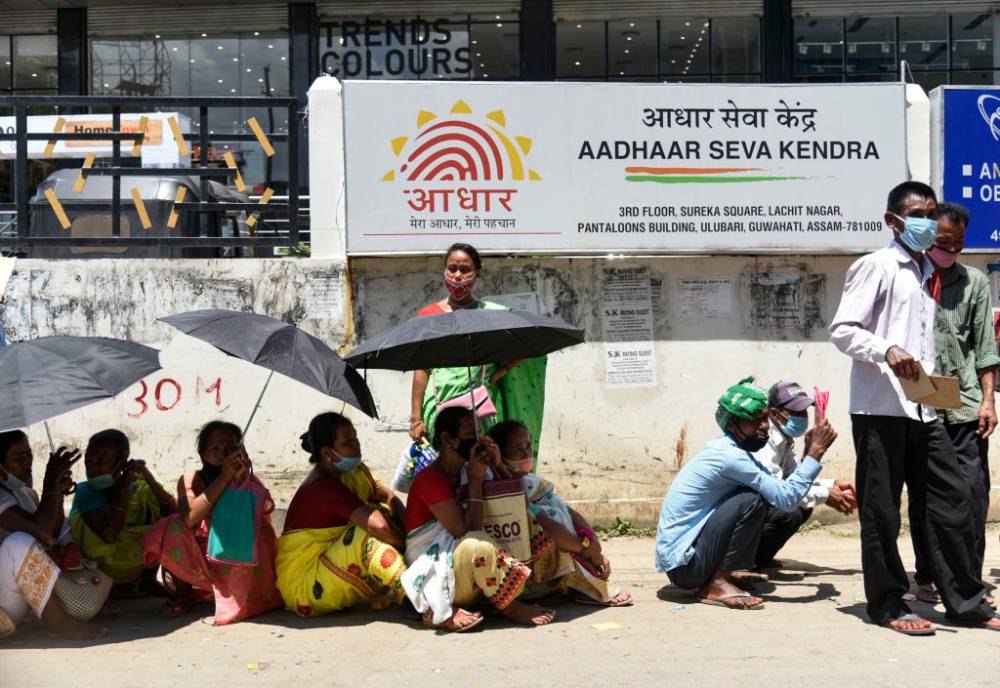
In numerous Indian towns, Aadhaar Seva Kendras (ASKs) have been established by the Unique Identification Authority of India (UIDAI). ASKs provide a variety of Aadhaar-related services, including new enrollment, address changes, name changes, and date of birth modifications. Any updates or modifications made at an Aadhaar Seva Kendra must be scheduled online.
The Aadhar Seva Kendra is the universal solution offered by the UIDAI for all Aadhar-related queries and services. It strives to resolve any questions and requests via an online Appointment Management System(AMS) if you’ve chosen to schedule an appointment before visiting the Aadhar Seva Kendra or an automatic Token Management System for those who choose to visit the Aadhar Seva Kendra directly till 5:30 PM daily. Here’s how you can book an appointment online for Aadhar enrollment:
- Step 1: Visit the UIDAI online portal (www.uidiai.gov.in)
- Step 2: You will see an option called ‘My Aadhar’. Click on that.
- Step 3: This would lead to a variety of drop-down menus. Select the ‘Get Aadhar’ option, following which you will see a ‘Book Appointment’ option. Click on that.
- Step 4: Choose your preferred Aadhar Enrollment centre from the list displayed and click on ‘Proceed’ to book an appointment
- Step 5: Choose between getting a new Aadhar or updating your existing Aadhar details.
- Step 6: Enter your Registered Mobile Number in the stipulated space and complete the captcha. You will receive an OTP shortly, which you should to enter in the space provided and press enter.
- Step 7: Once you do so, you will see a form pop up on your screen that you’re to fill up carefully. After this, you can edit the date and time of your preference for the appointment under the ‘Manage Appointment’ tab.
Key Takeaways
- You can book your Aadhaar appointment online and offline.
- Online appointment for Aadhaar card is free of cost. However, there is a Rs. 50 charge for the verification process at the Aadhar Seva Kendra’s ‘Cash Counter’
- You can even postpone your Aadhaar appointment online.

Also Read: What is Aadhaar Virtual ID?
Process to Cancel or Reschedule Aadhaar Appointment
On the UIDAI website, you have the ability to reschedule or cancel your online appointment for Aadhaar enrollment. You should make a habit of having your token number on hand, which was given to you when you made the appointment.
Follow these instructions to cancel your Aadhaar card appointment online:
- Visit appointments.uidai.gov.in to access the official website.
- Type in the Token ID you received when scheduling your Aadhaar appointment.
- Enter the mobile number you provided while making the appointment.
- To cancel your appointment, click the “cancel appointment” button.
- When you cancel, you will immediately receive an SMS informing you that the appointment scheduled using the prior token id has been cancelled.
The actions listed below should be followed to reschedule your Aadhaar card appointment online:
- Visit appointments.uidai.gov.in to access the official website.
- Type in the Token ID you received when scheduling your Aadhaar appointment.
- Enter the mobile number you used to make the appointment.
- To reschedule your appointment, click the “reschedule appointment” button.
- Please enter the location and chosen enrollment centre information, along with the appointment date and time.
- Fill out the verification code.
- To confirm, click the “fix appointment” button.
- Additionally, you will get an SMS with all the information about your rescheduled appointment.
Process of Getting Aadhaar Appointment Online
The sole purpose of booking an Online appointment for Aadhaar card is to avoid those long and physically draining queues at the Enrollment Offices. This can be done in the comfort of your home through the UIDAI online portal via the following steps. Online appointment for Aadhaar card requires the following steps:
- Step 1: Visit the UIDAI online portal (www.uidiai.gov.in)
- Step 2: You will see an option called ‘My Aadhar’. Click on that.
- Step 3: This would lead to a variety of drop-down menus. Select the ‘Get Aadhar’ option, following which you will see a ‘Book Appointment’ option. Click on that.
- Step 4: You are instructed to read the terms and conditions thoroughly, following which you are required to check a box intimating your prior enrollment of an Aadhar. Check yes if you’ve already enrolled for an Aadhar.
- Step 5: Enter the security code displayed for verification purposes.
- Step 6: Select the ‘Verify and proceed’ option.
- Step 7: You’ll be forwarded to a new page showing an Enrollment Request Application form, which you are requested to fill up carefully.
- Step 8: Once you’re done filling up the form, you’re requested to check your particulars once more, before clicking on ‘Save and Continue’
- Step 9: Your particulars will be displayed once more. Please check it meticulously once more as you won’t be allowed to make any changes beyond this point.
- Step 10: Once you’re done checking your demographic details, click on ‘Submit’. You will be asked to select an enrollment centre of your choice. Do so.
- Step 11: Once you’re done selecting, you will be redirected to a completion window which signifies the generation of your Aadhar appointment. You will now receive a Pre-Enrollment slip, which you are advised to carry with you while visiting the Enrollment Center.
Did You Know?
The 12 digit Aadhaar number is a unique identifying number that never begins with “0” or “1”. The Aadhaar number’s last digit is a check sum digit.
Criteria for Aadhaar Enrollment
In order to obtain an Aadhaar card, you must fullfill the following criteria:
- Aadhaar cards can be obtained by any Indian citizen, including infants and minors. NRIs and foreigners who have been in India for more than a year are eligible for the Baal Aadhaar, although the Aadhaar card is only for adults.
- For non-resident Indians having Indian passports, it is suggested to provide an Aadhaar card immediately upon arrival rather than 180 days later.
Also Read: All about Aadhaar Card Password
Documents Required for Aadhaar Enrollment
To successfully enroll for an Aadhar card, individuals are required to present self attested copies of certain documents. These documents are necessary for the Aadhar to verify the applicant’s provided information. These documents are divided essentially into two types: proof of address (POA) and proof of identity. Refer to the following table to understand the bifurcation of the following documents.
| Proof of address (POA) | Proof of identification (POI) |
|---|---|
| Voter identificatioon | Certificate of birth |
| Passport | Pan card |
| Driving license | |
| Ration/PDS card |
Word to Remember
Aadhaar Seeding
Aadhaar seeding refers to linking Aadhaar to other documents like PAN, Ration Card, etc.
Whom To Contact for Issues with Aadhaar Appointment Booking?
For resident inquiries and issues regarding Aadhaar enrollment, Updating, and other services, UIDAI has established a multi-channel grievance management procedure. There are many ways for residents to contact UIDAI, including the phone, email, chat, and web portal.
Residents must always have their EID, URN, or SRN on hand in order to quickly handle concerns.
Below is full information about the channels that are available:
- Toll Free Number – 1947: UIDAI has provides a toll free number to address all grievances and queries related to Aadhar enrollment/updation.
- On the UIDAI website (uidai.gov.in), there is a chatbot available for quick automated responses regarding Aadhaar and its services. It is accessible at the bottom right of the Resident portal and the main page of the UIDAI website. Using the blue “Ask Aadhaar” icon, residents can begin chatting with the chatbot. Both Hindi and English are supported.

Conclusion
Booking an online appointment for Aadhaar card is usually a hassle-free process. The next you want to schedule an Aadhaar appointment for enrolling for Aadhaar or updating Aadhaar details or any other reason, follow these simple steps.
Also Read: What is an E-Aadhaar Card?
FAQs
Any resident may use https://appointments.uidai.gov.in/bookappointment.aspx to schedule an appointment for oneself or a family member. A resident does not need an Aadhaar-registered mobile number to use this free service.
You can find the list of the nearest Aadhar enrollement center by visiting the official UIDAI webiste.
You get an SMS on the registered cellphone number once the Aadhaar is generated. By clicking “Check Aadhaar Status” or https://resident.uidai.gov.in/check-aadhaar, you can easily check the status of your Aadhaar.
A: You can book an appointment at Aadhar Seva Kendra to avail the following features: New Aadhar Enrollment, Update of particulars (Name, Gender, Age, Address, Mobile Number, E-mail ID), Updating biometrics, etc.
A: You’re expected to carry documents that validate the claims you’ve made on your Aadhar Enrollment Form, like Passport, Driving License, Ration Card, Birth certificate, etc.
A: It is free of cost to book an appointment at an Aadhar Seva Kendra online. However, the applicant is expected to pay Rs. 50 for the verification process at the Aadhar Seva Kendra’s ‘Cash Counter’.
A: Yes, it is possible to postpone or modify your Aadhar Seva Kendra appointment. To do so, you are instructed to edit the date and time of your preference for the appointment under the ‘Manage Appointment’ window on the official UIDAI online portal.
A: Aadhaar documents come to the address mentioned in the Aadhaar Card. If you have permanently moved, it is advised to keep your Aadhaar address up-to-date.
A: Aadhaar Seva Kendras work all 7 days from 9:30 a.m. to 5:30 p.m. Be sure to check the timings of the Aadhaar Seva Kendra near you as well.